
It’s even easier than you could imagine!
WordPress offers the possibility to add a countdown timer in 3 distinct ways.
- as a widget;
- on a post;
- to a product.
Let’s start with 6 easy steps for adding the timer as a widget.
1. Go to the Countdown Time Builder and copy the embedded code of the countdown timer. In case you haven’t fixed one yet, go and do this.
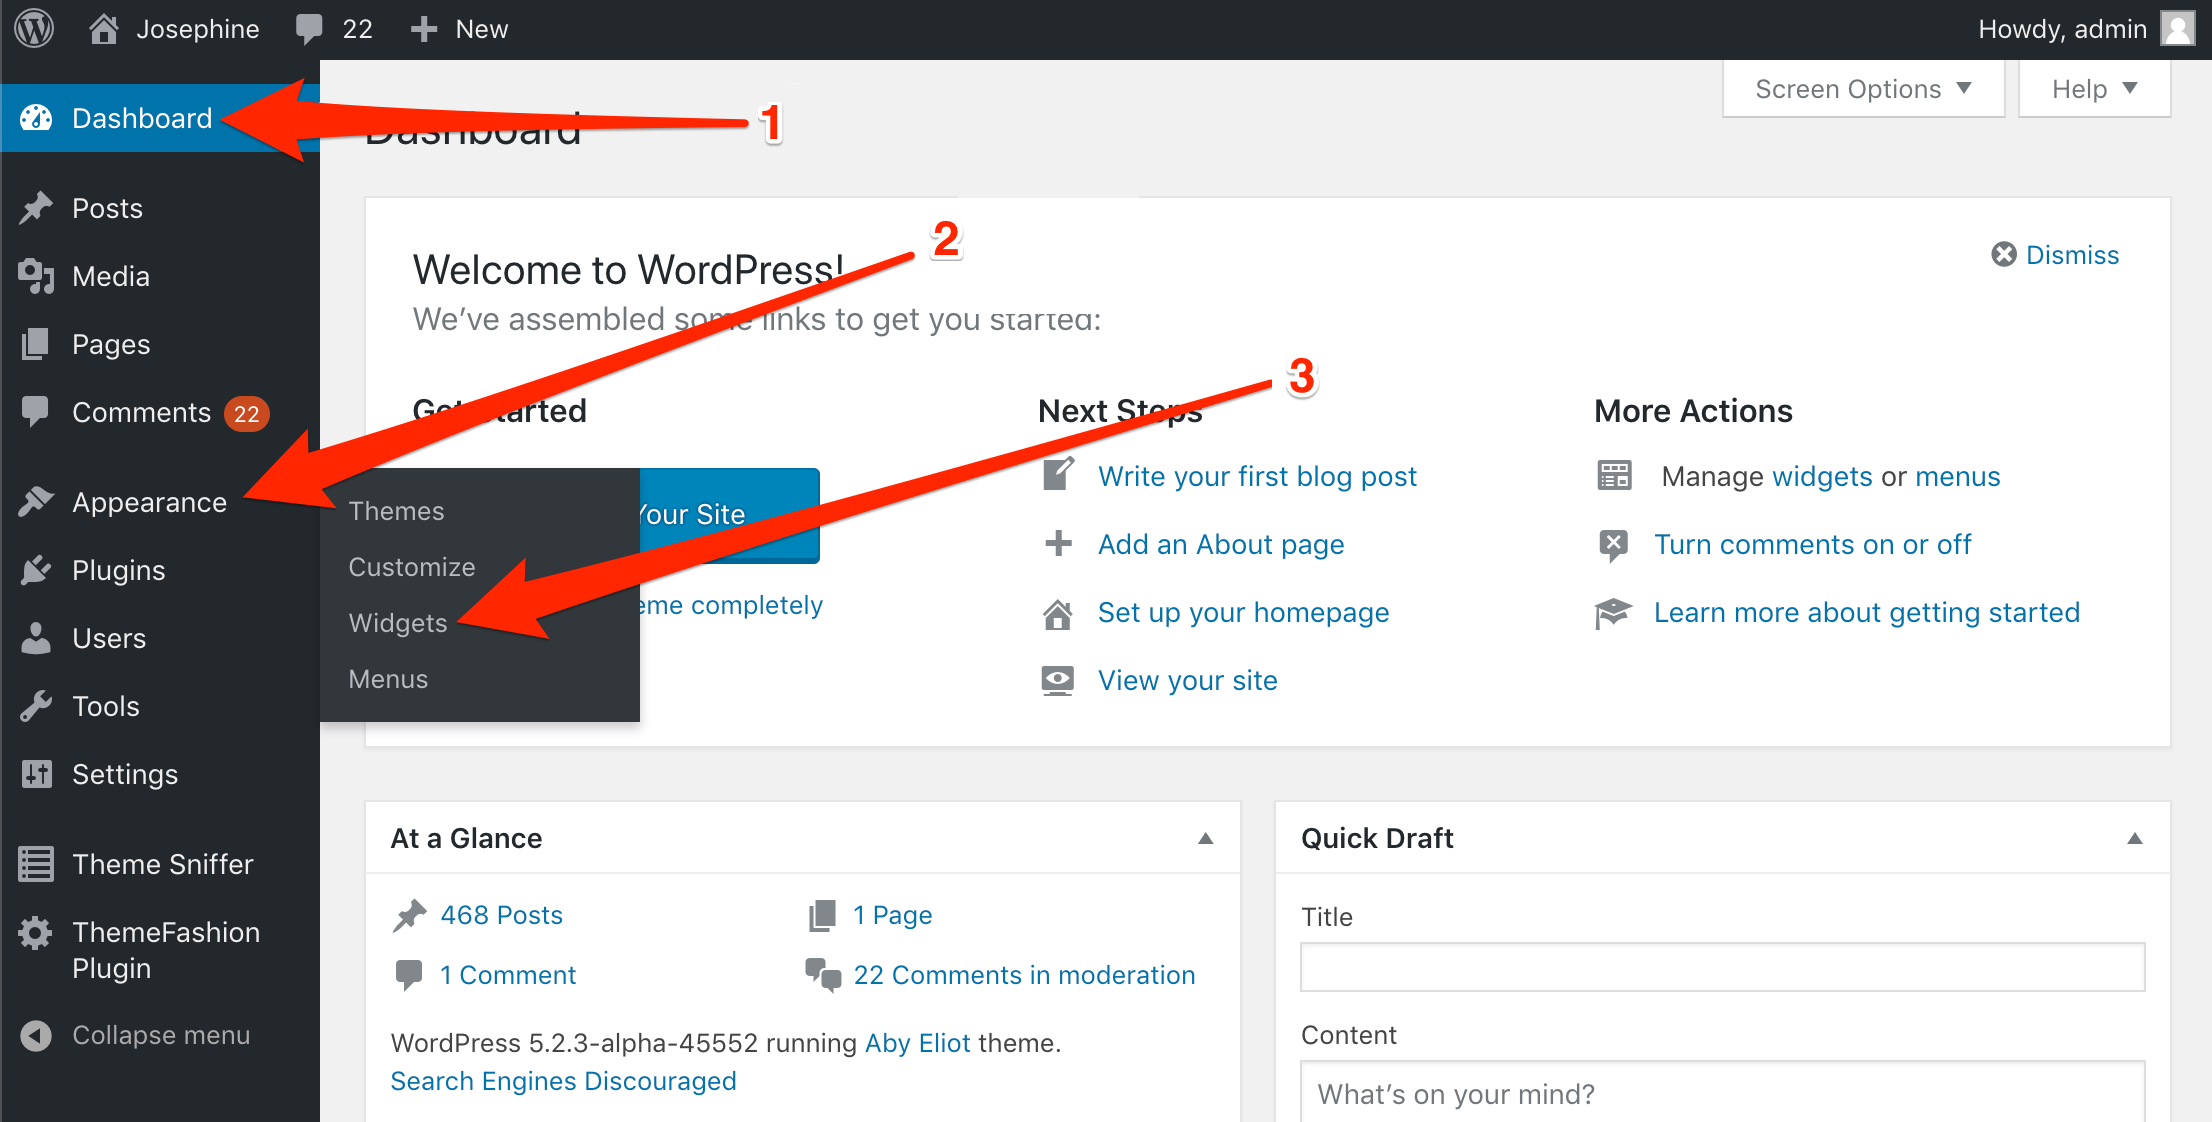
2. In WordPress, select Appearance from the Dashboard and move to Widgets.
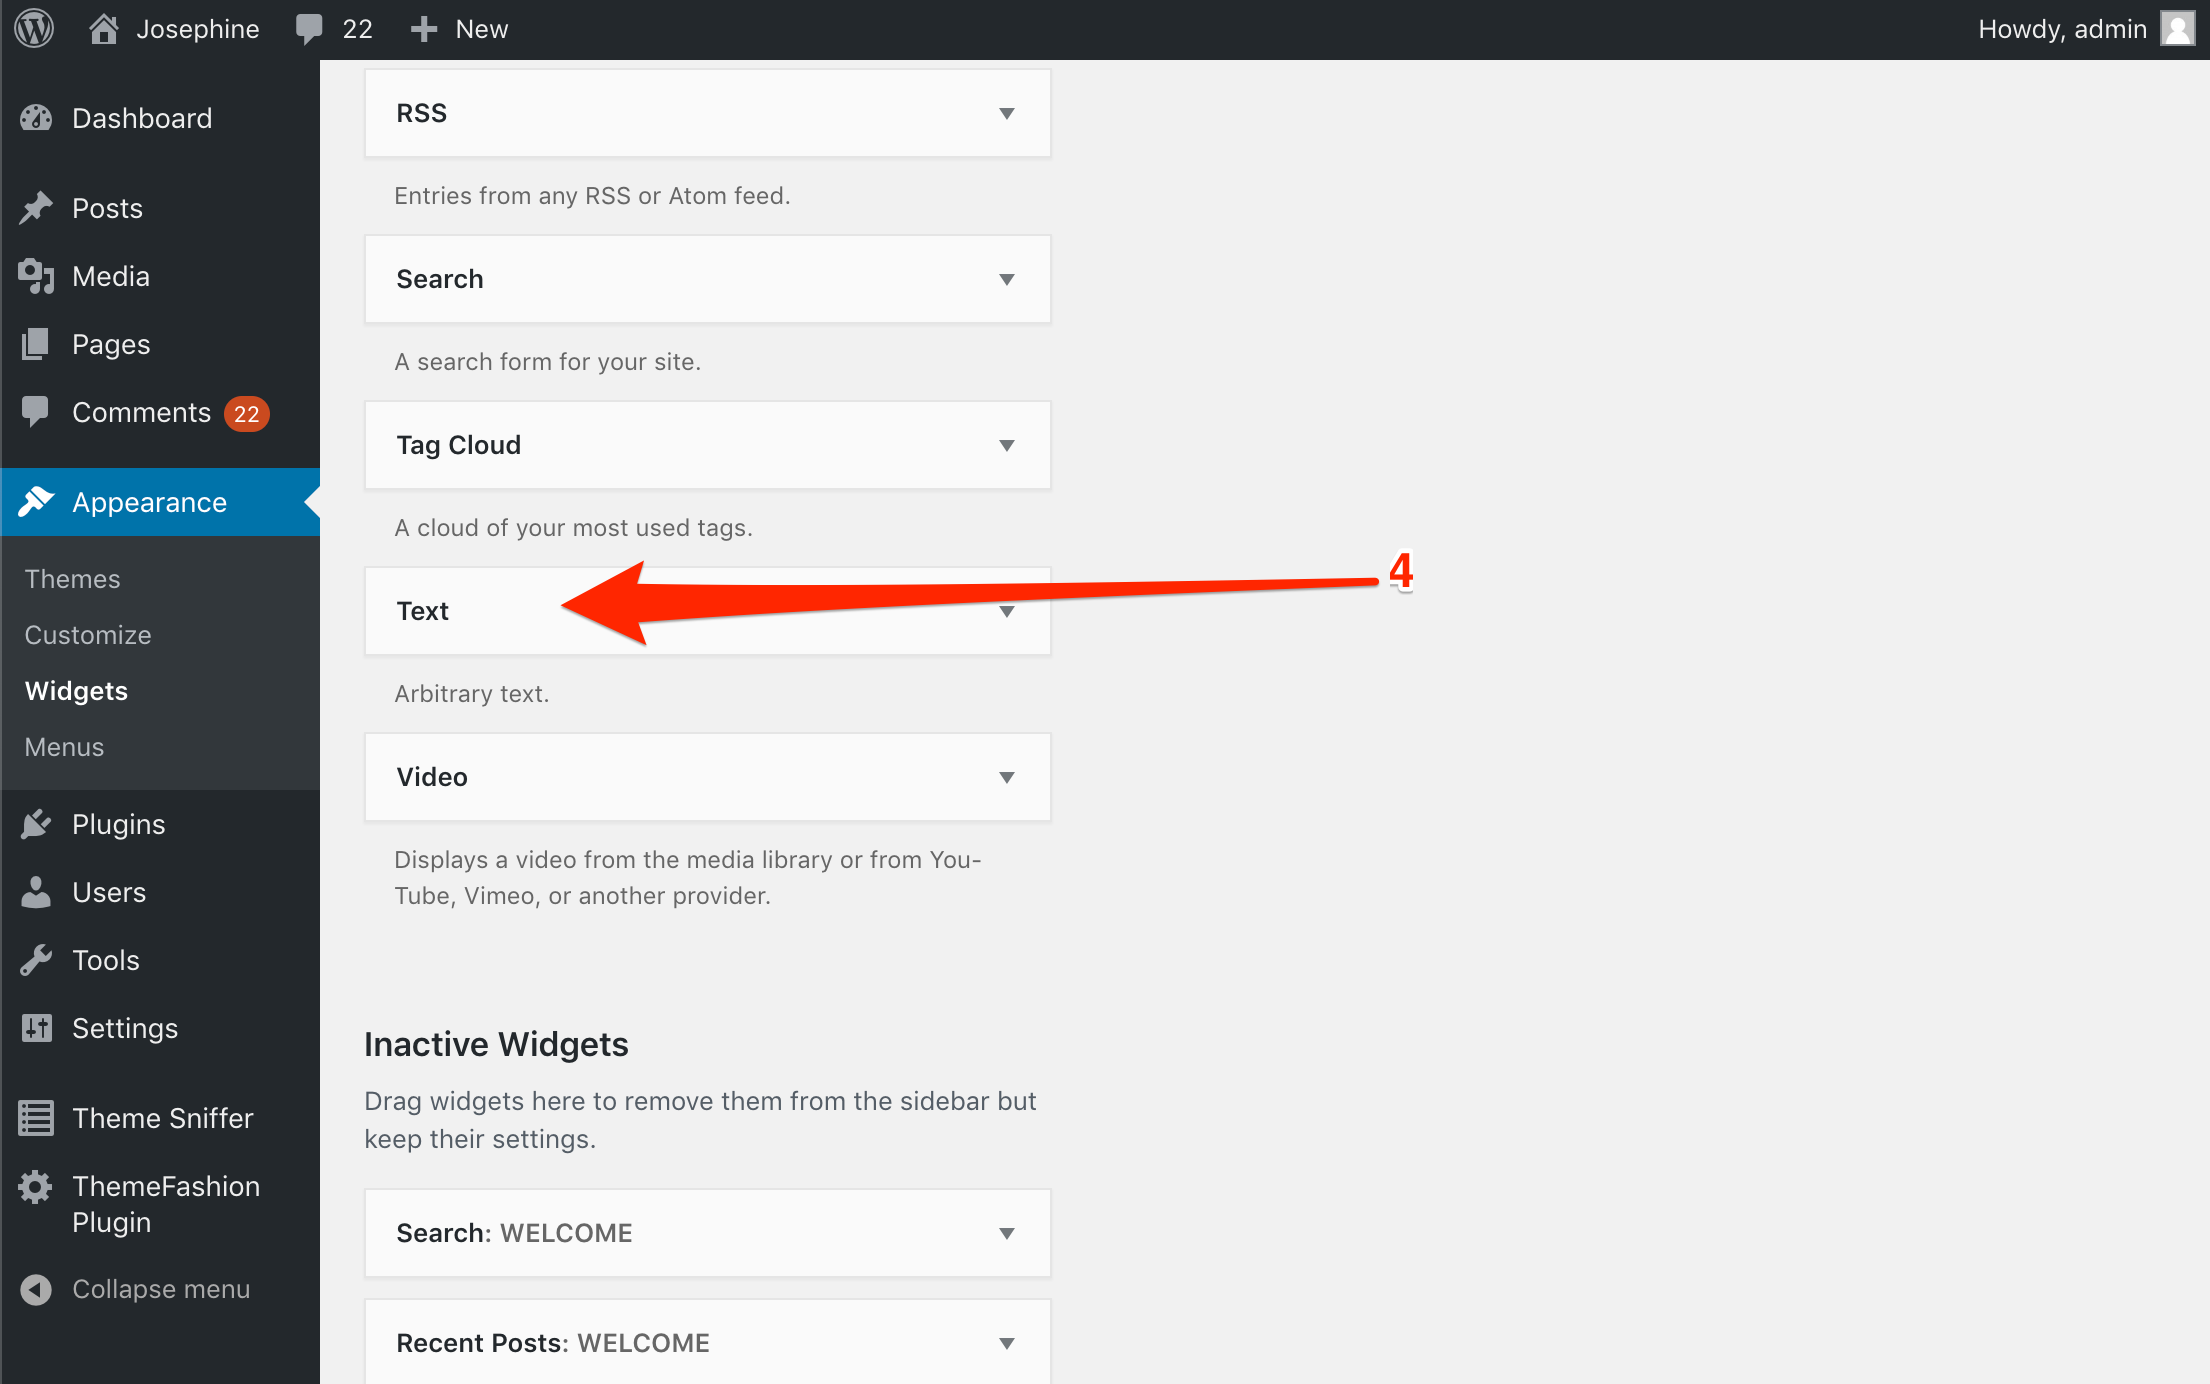
3. Select Text fromthe Available Widgets menu.
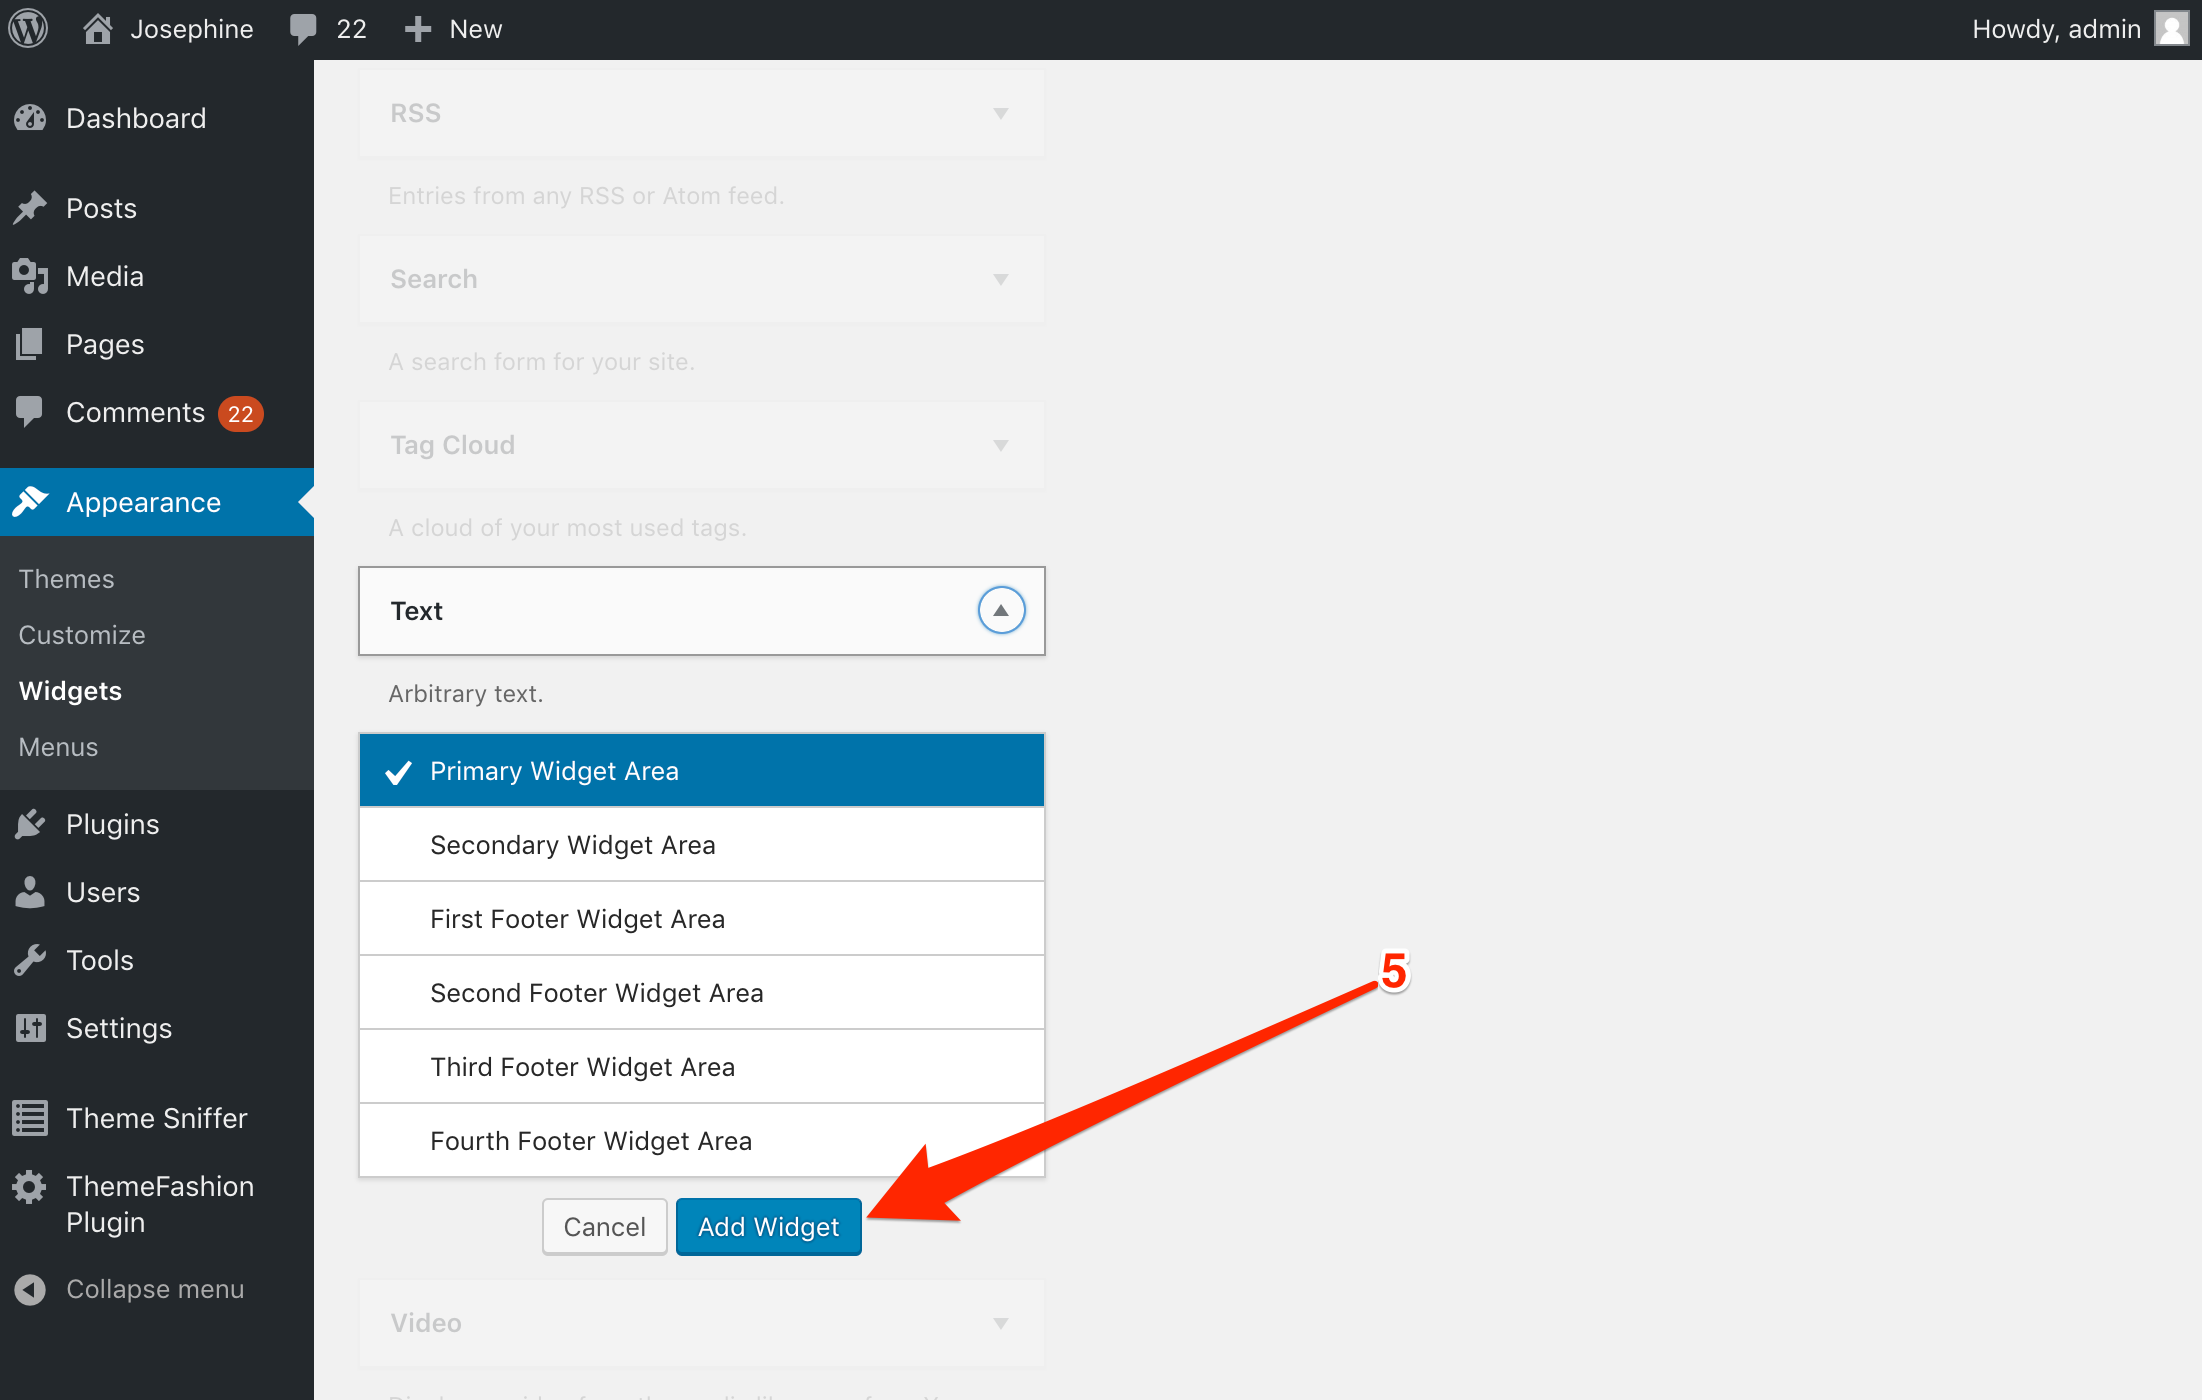
4. Pick a section and click Add Widget (e.g. Sidebar).
5. Insert the code in the Content field. You can add the title if you want.
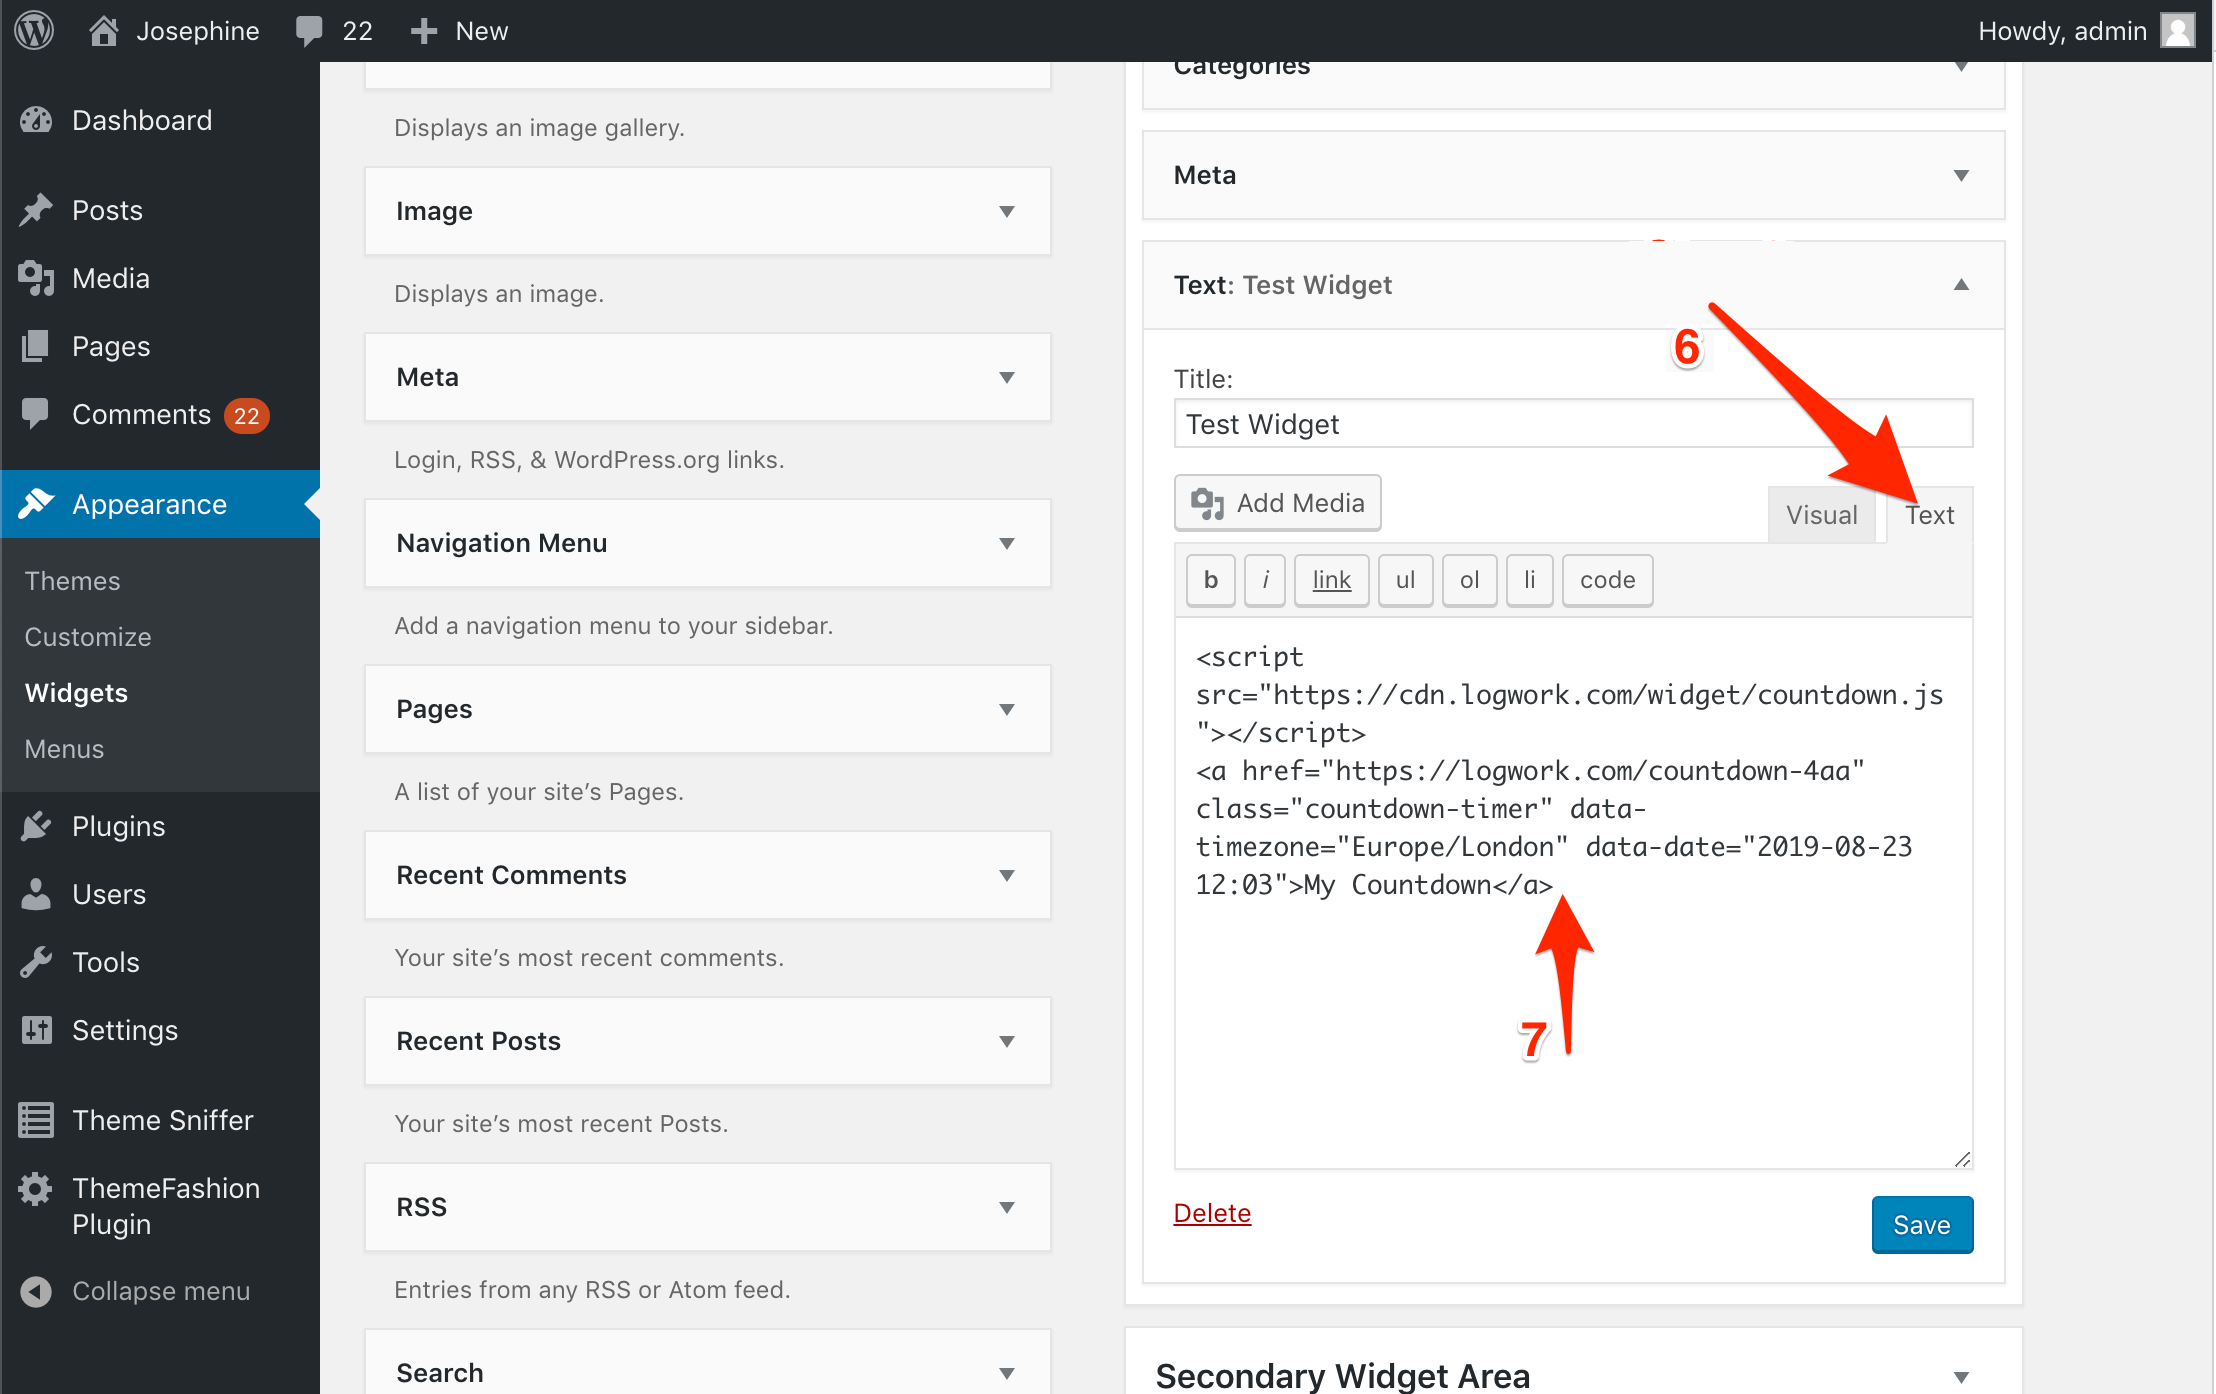
6. Save your deed and see the results!

NOTE Feel free to contact us in case you have any questions!
Let’s add the countdown timer to a blog post.
1. Go to Countdown Clock Builder and copy the embedded code of the countdown timer. In case you haven’t fixed one yet, go and do this.
2. From the Post menu, choose to Add New. Select to format the HTML.
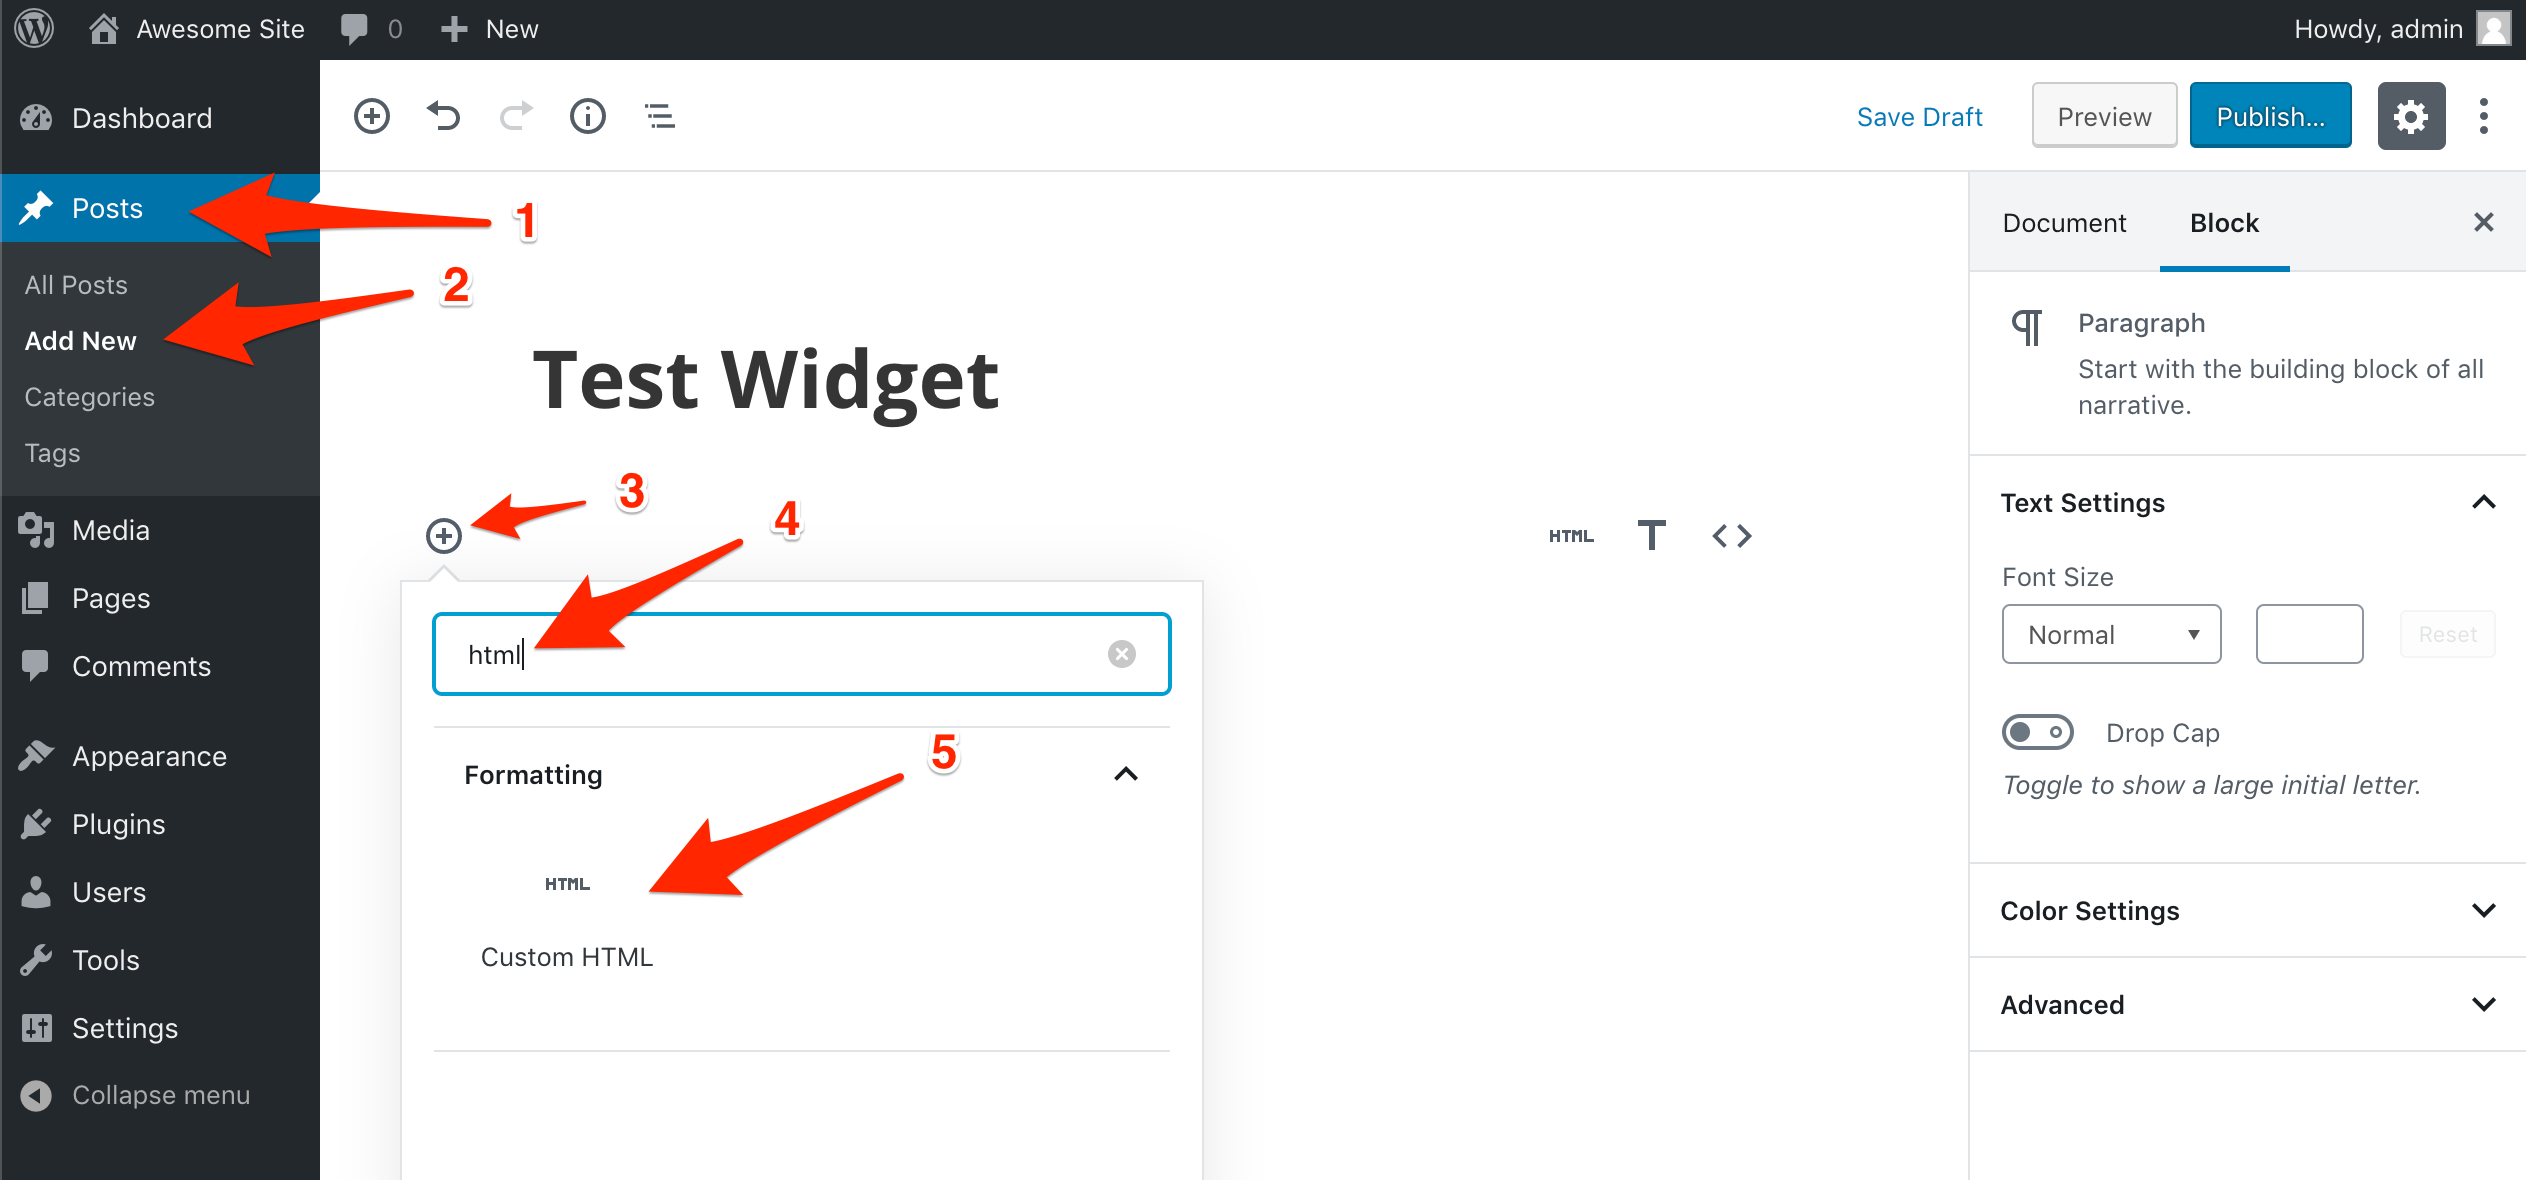
3. Embed the Code for the countdown timer. Publish it.
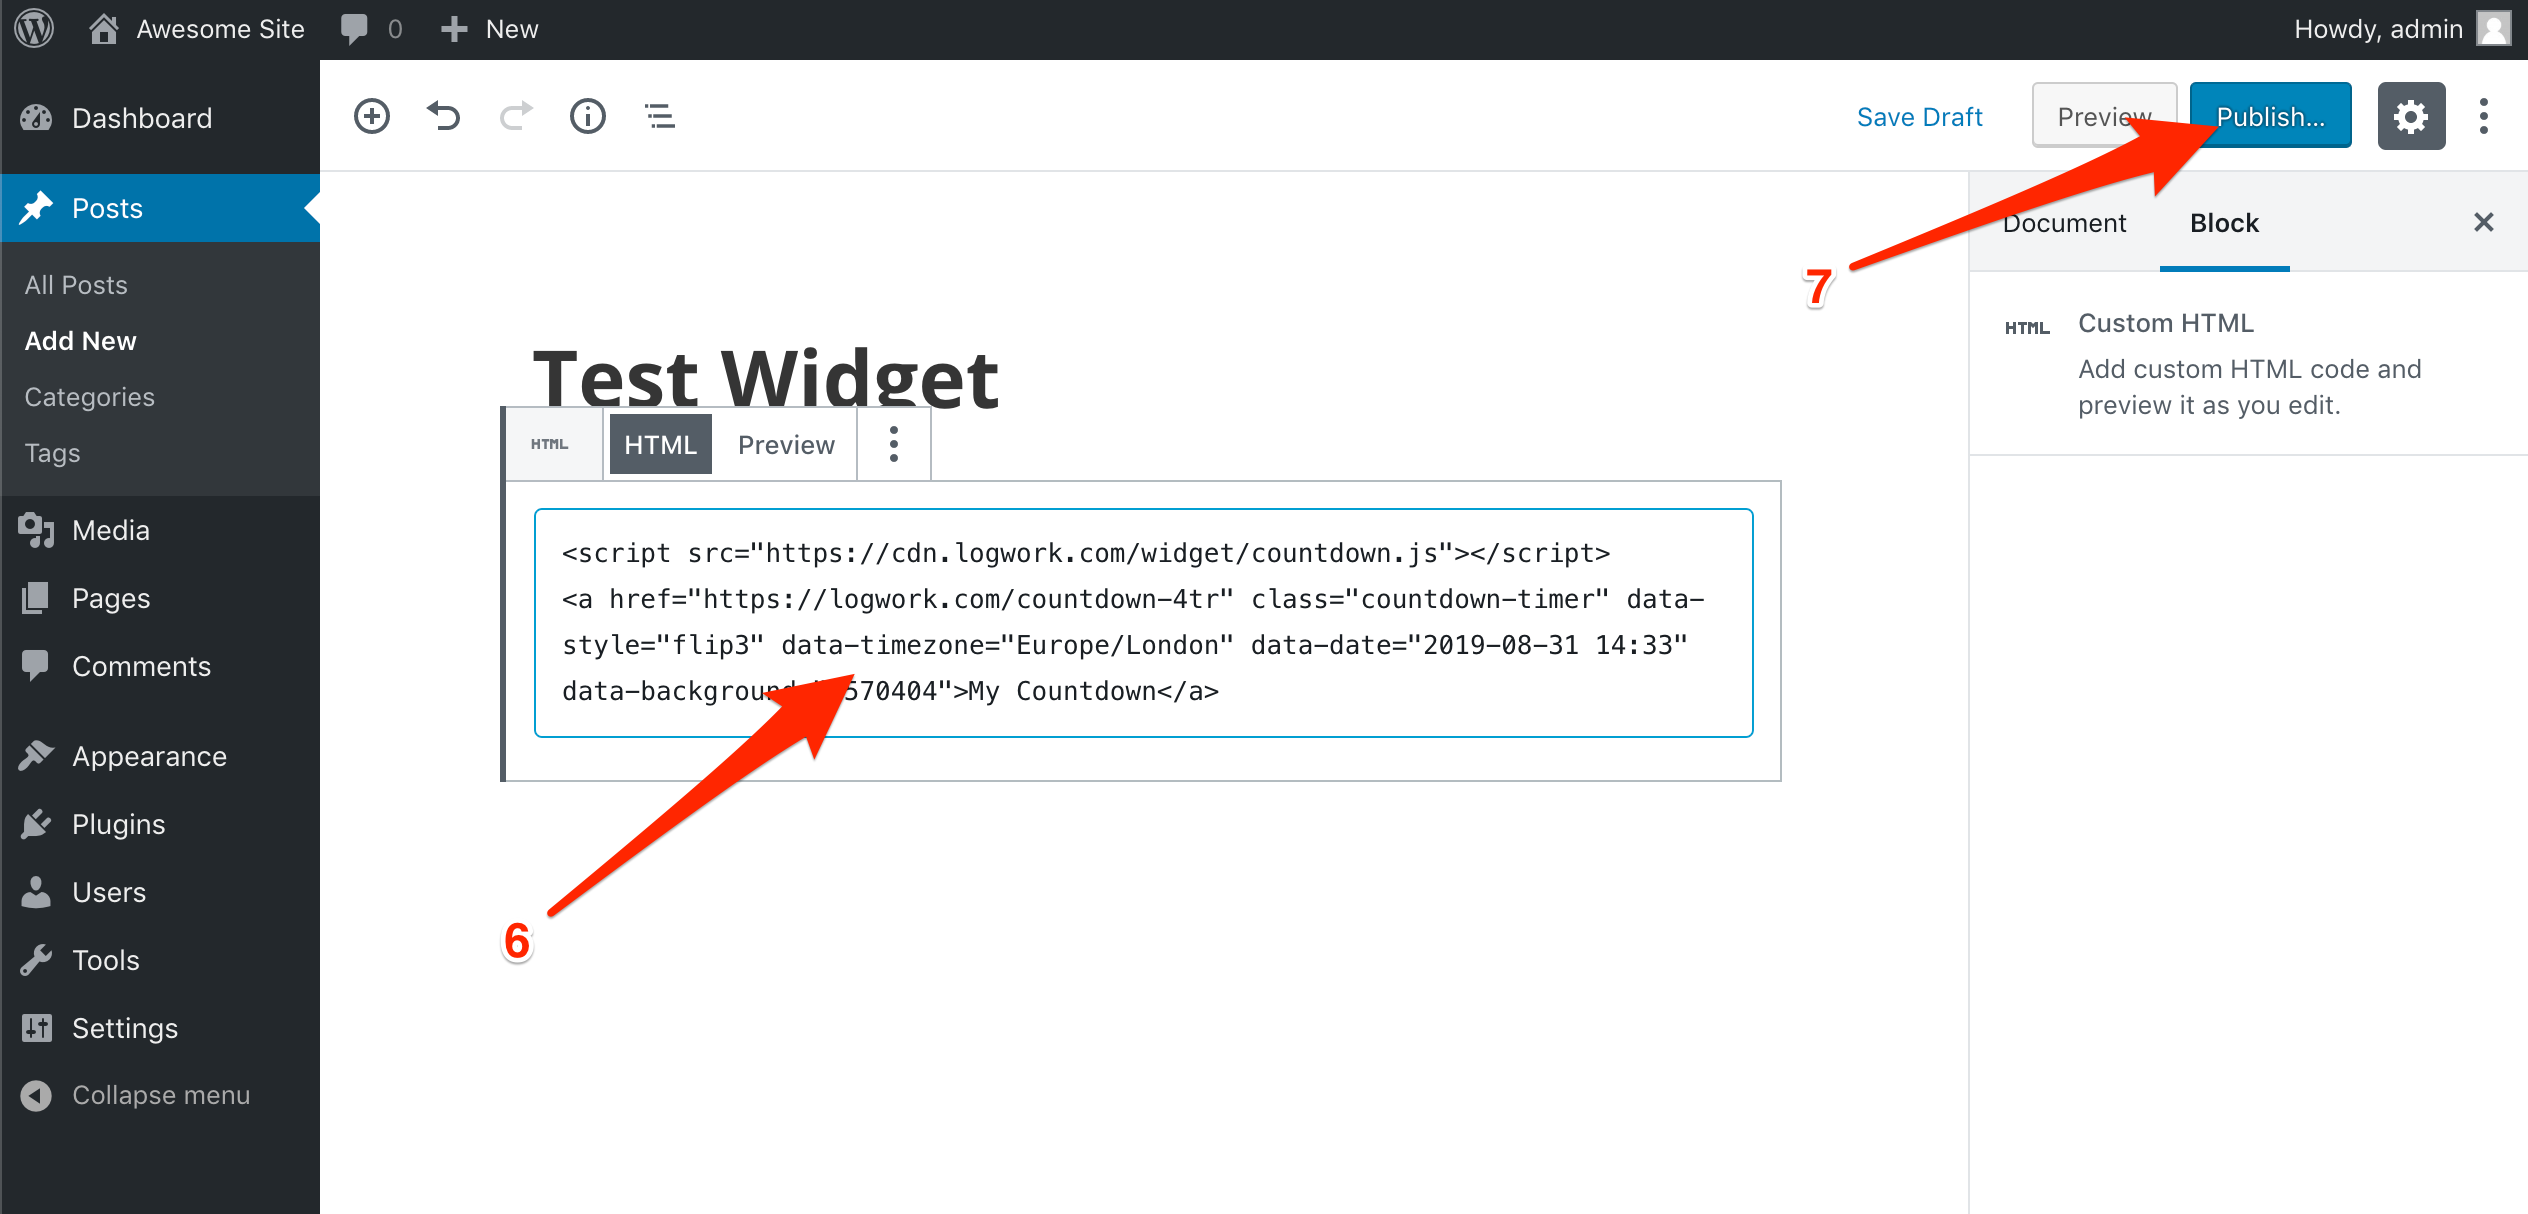
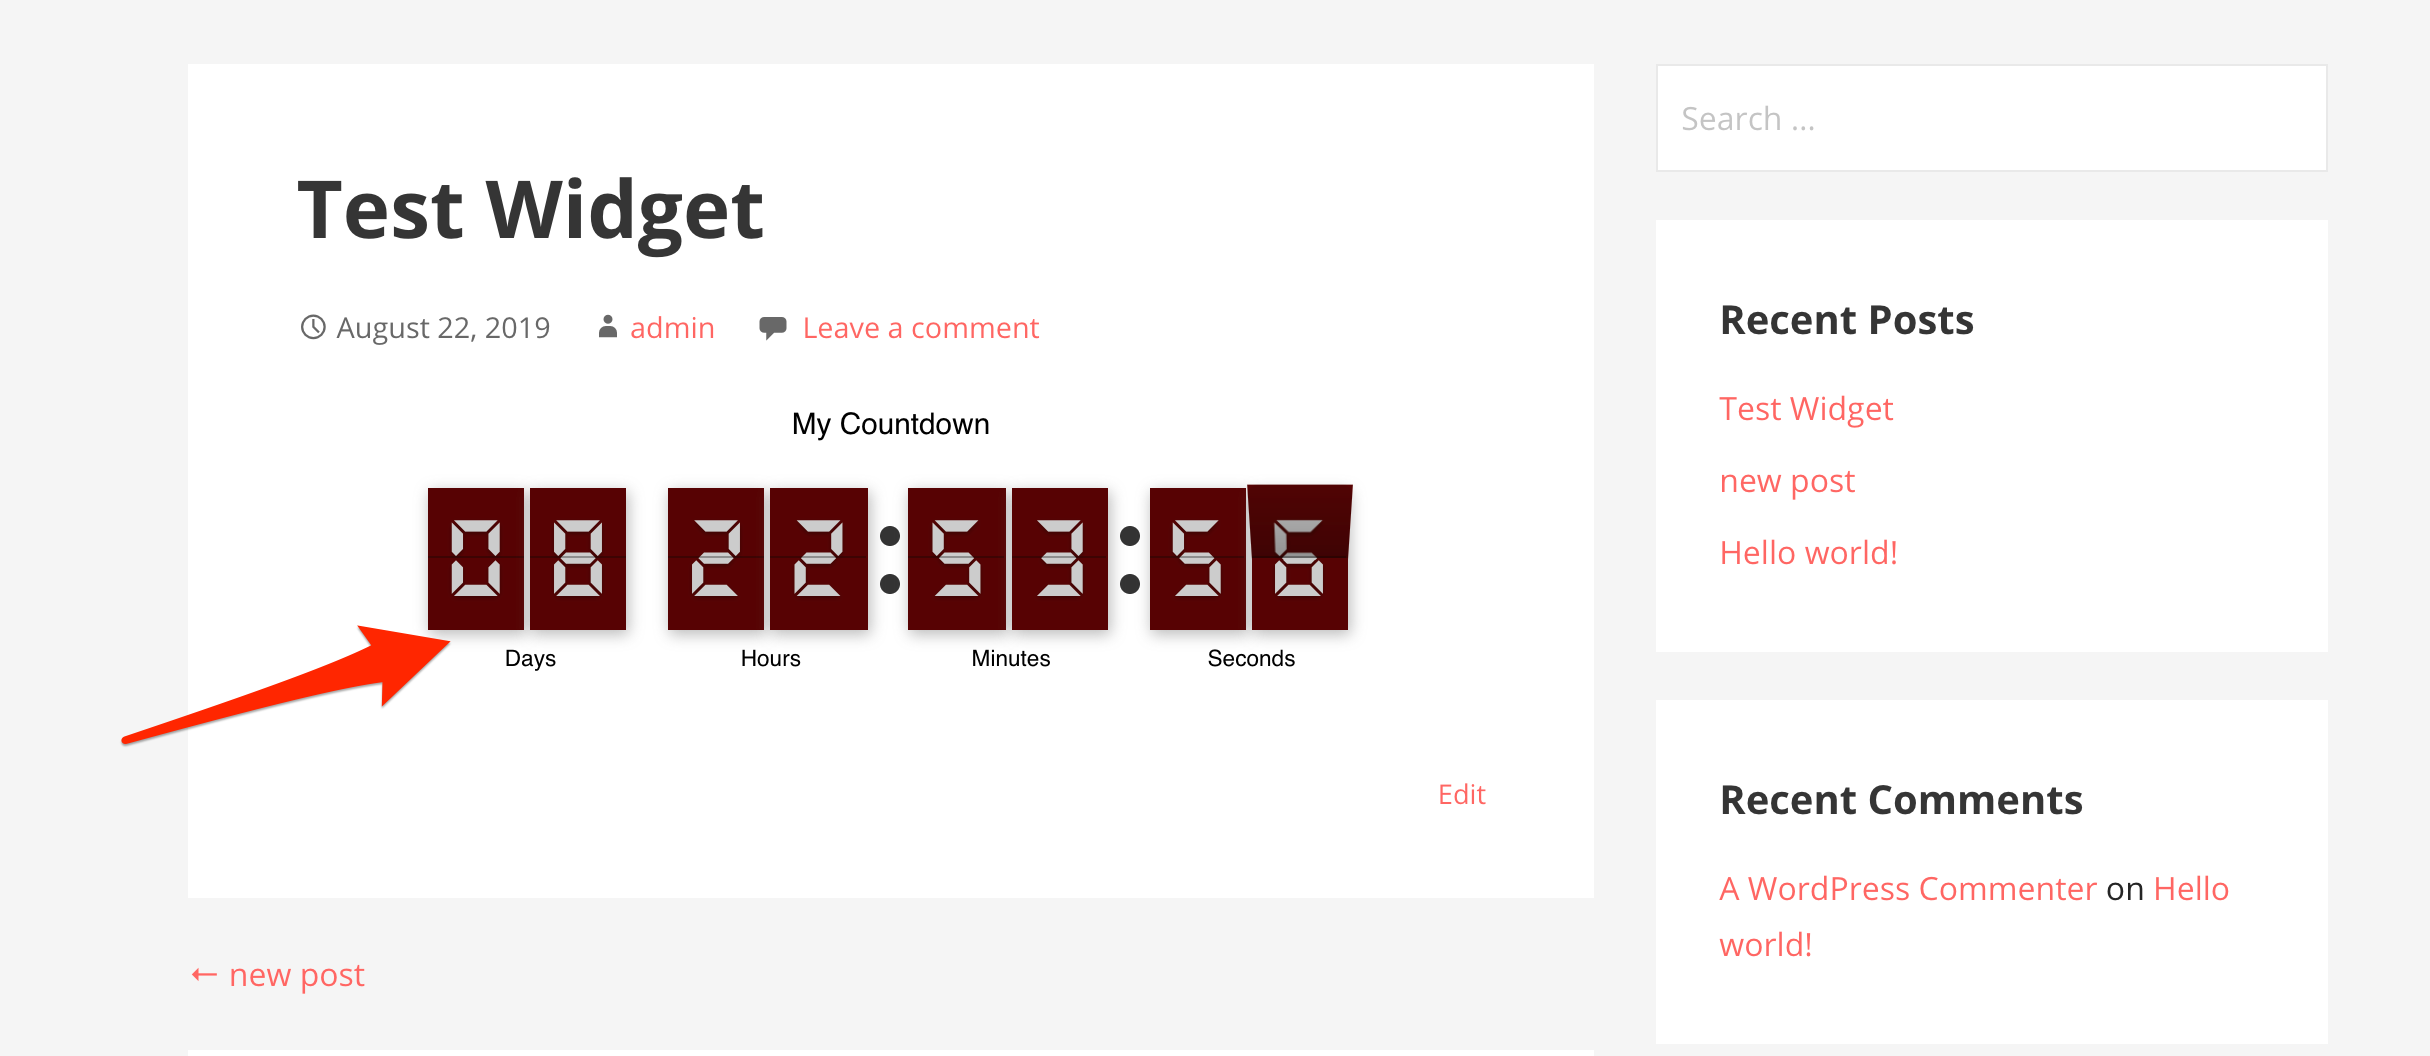
4. See the changes.
It’s the turn to see how you can add a timer to a product in your store.
1. Go to Countdown Timer Builder and copy the embedded code of the countdown timer. In case you haven’t fixed one yet, go and do this.
2. In the Products menu, click on Add New button. In the text field, add the Embedded code. Scroll to find the short description of the product.
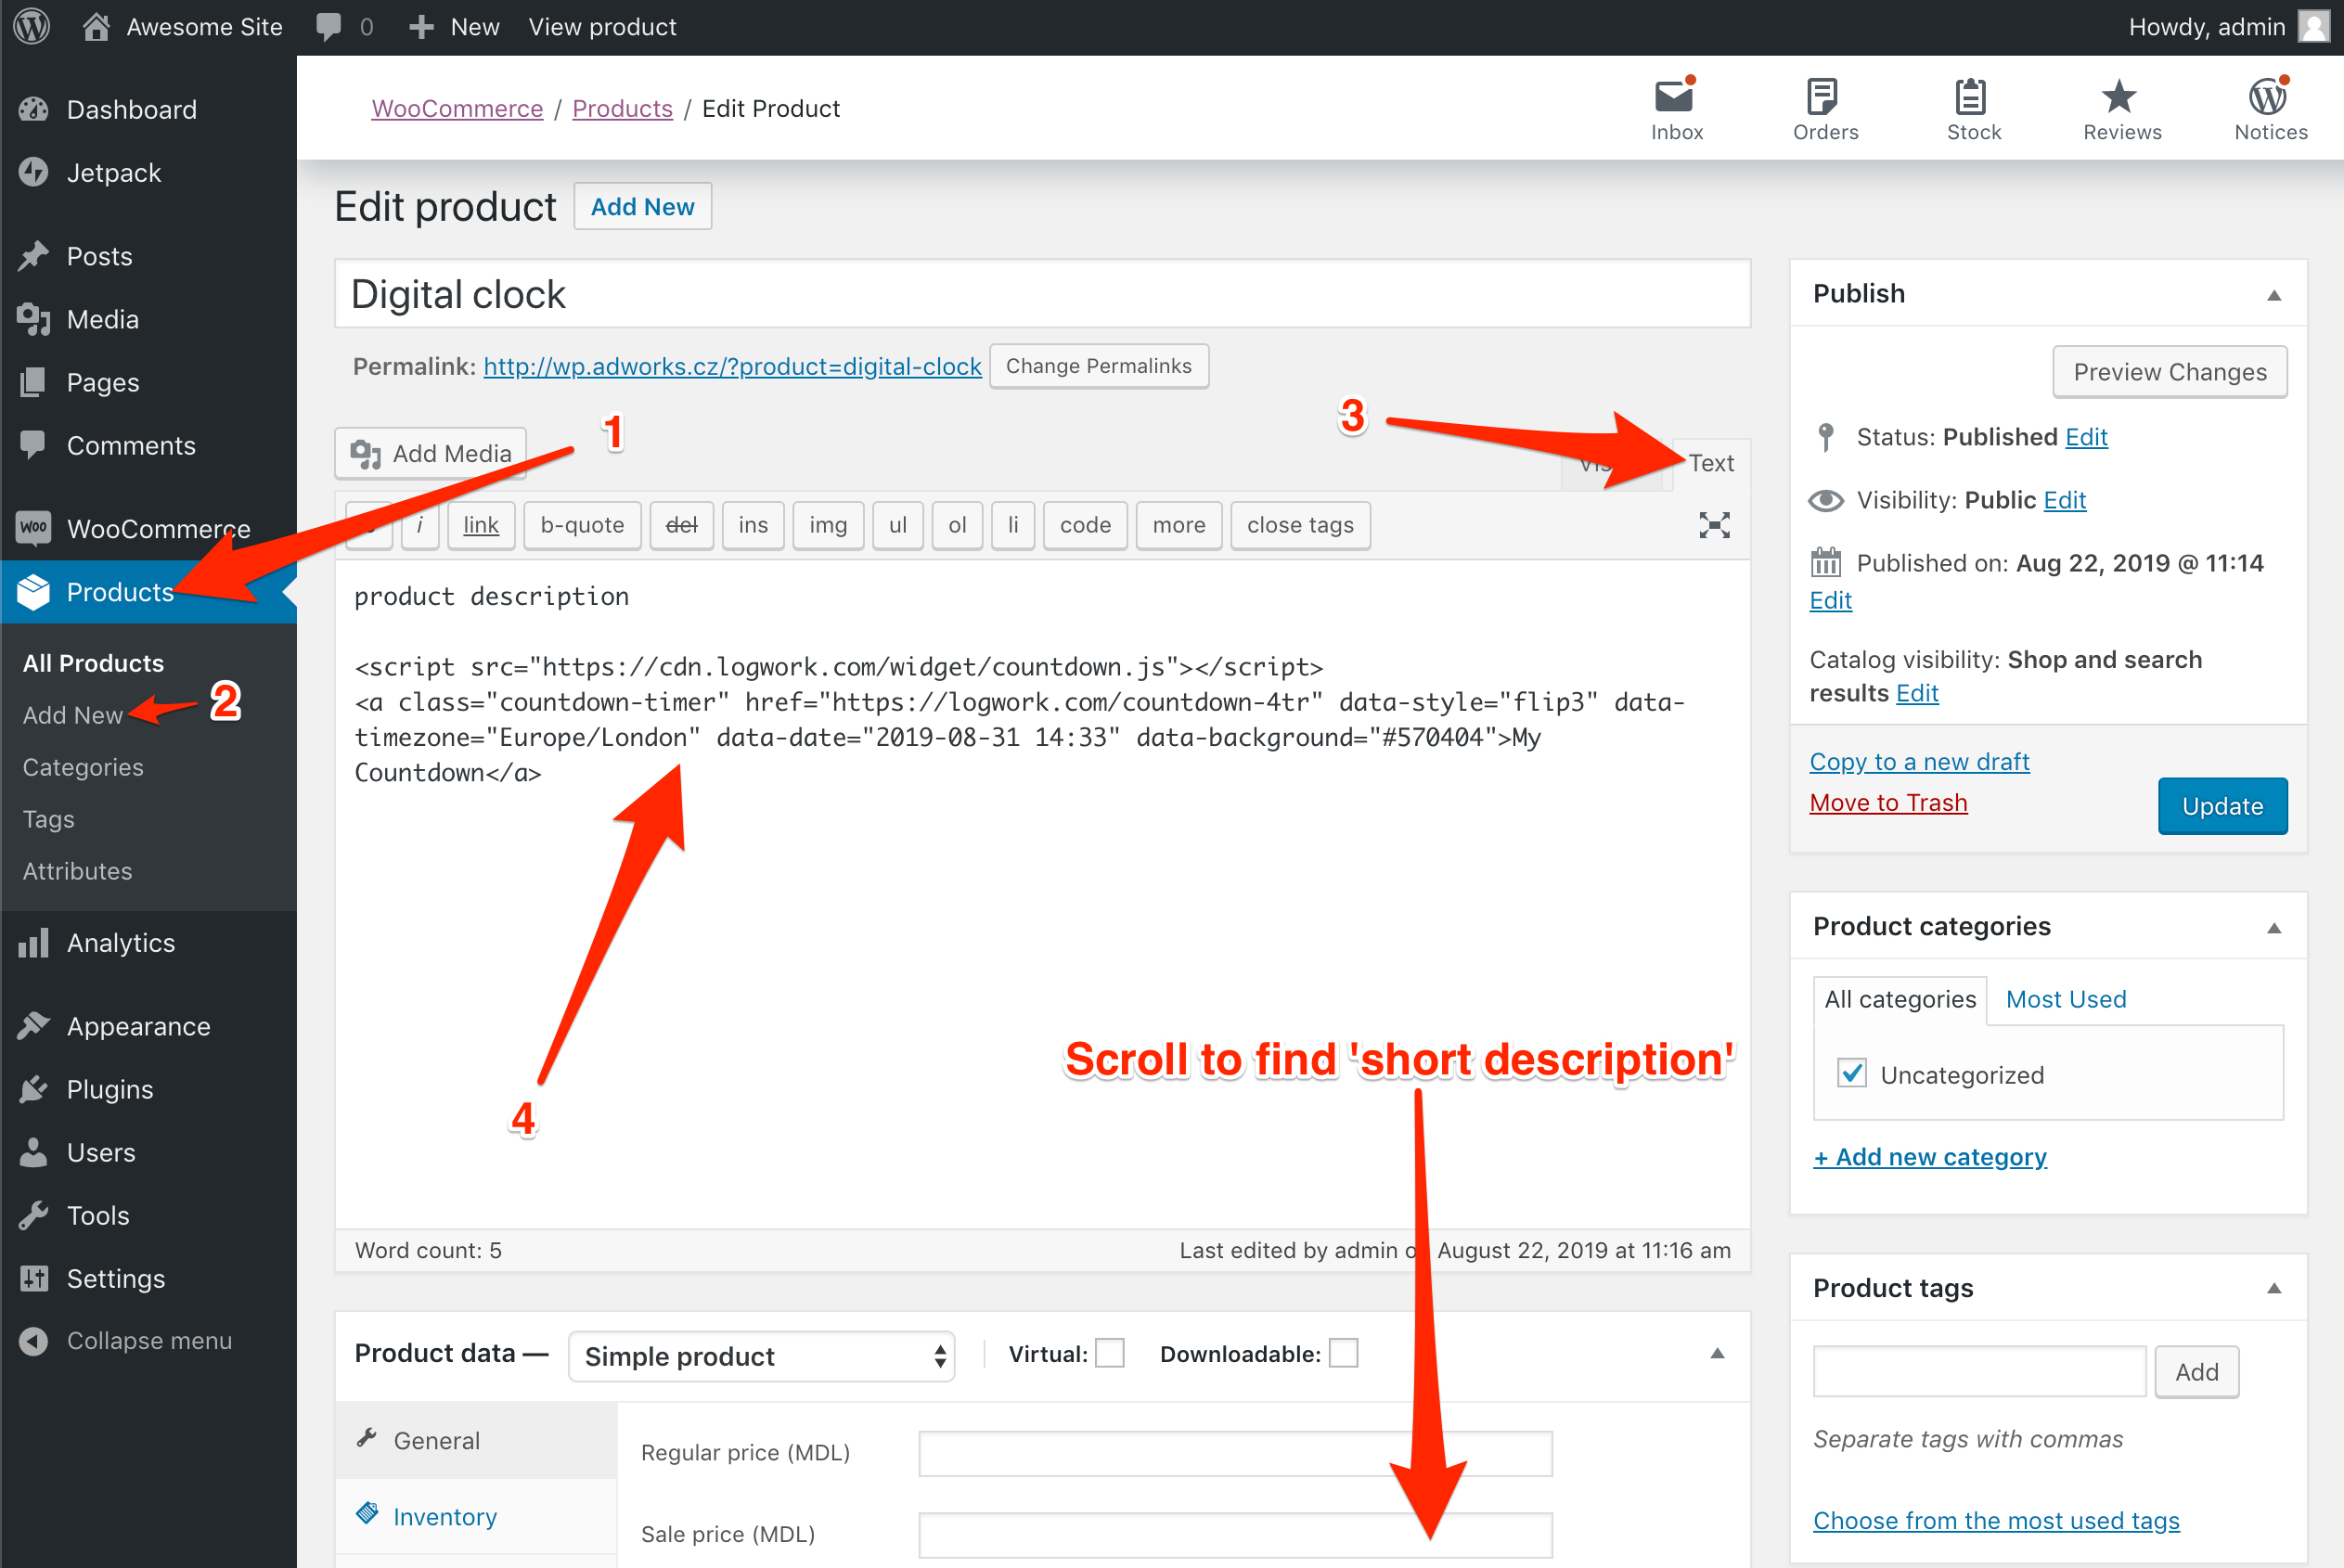
3. Click on Text. Add the Code in the text box.
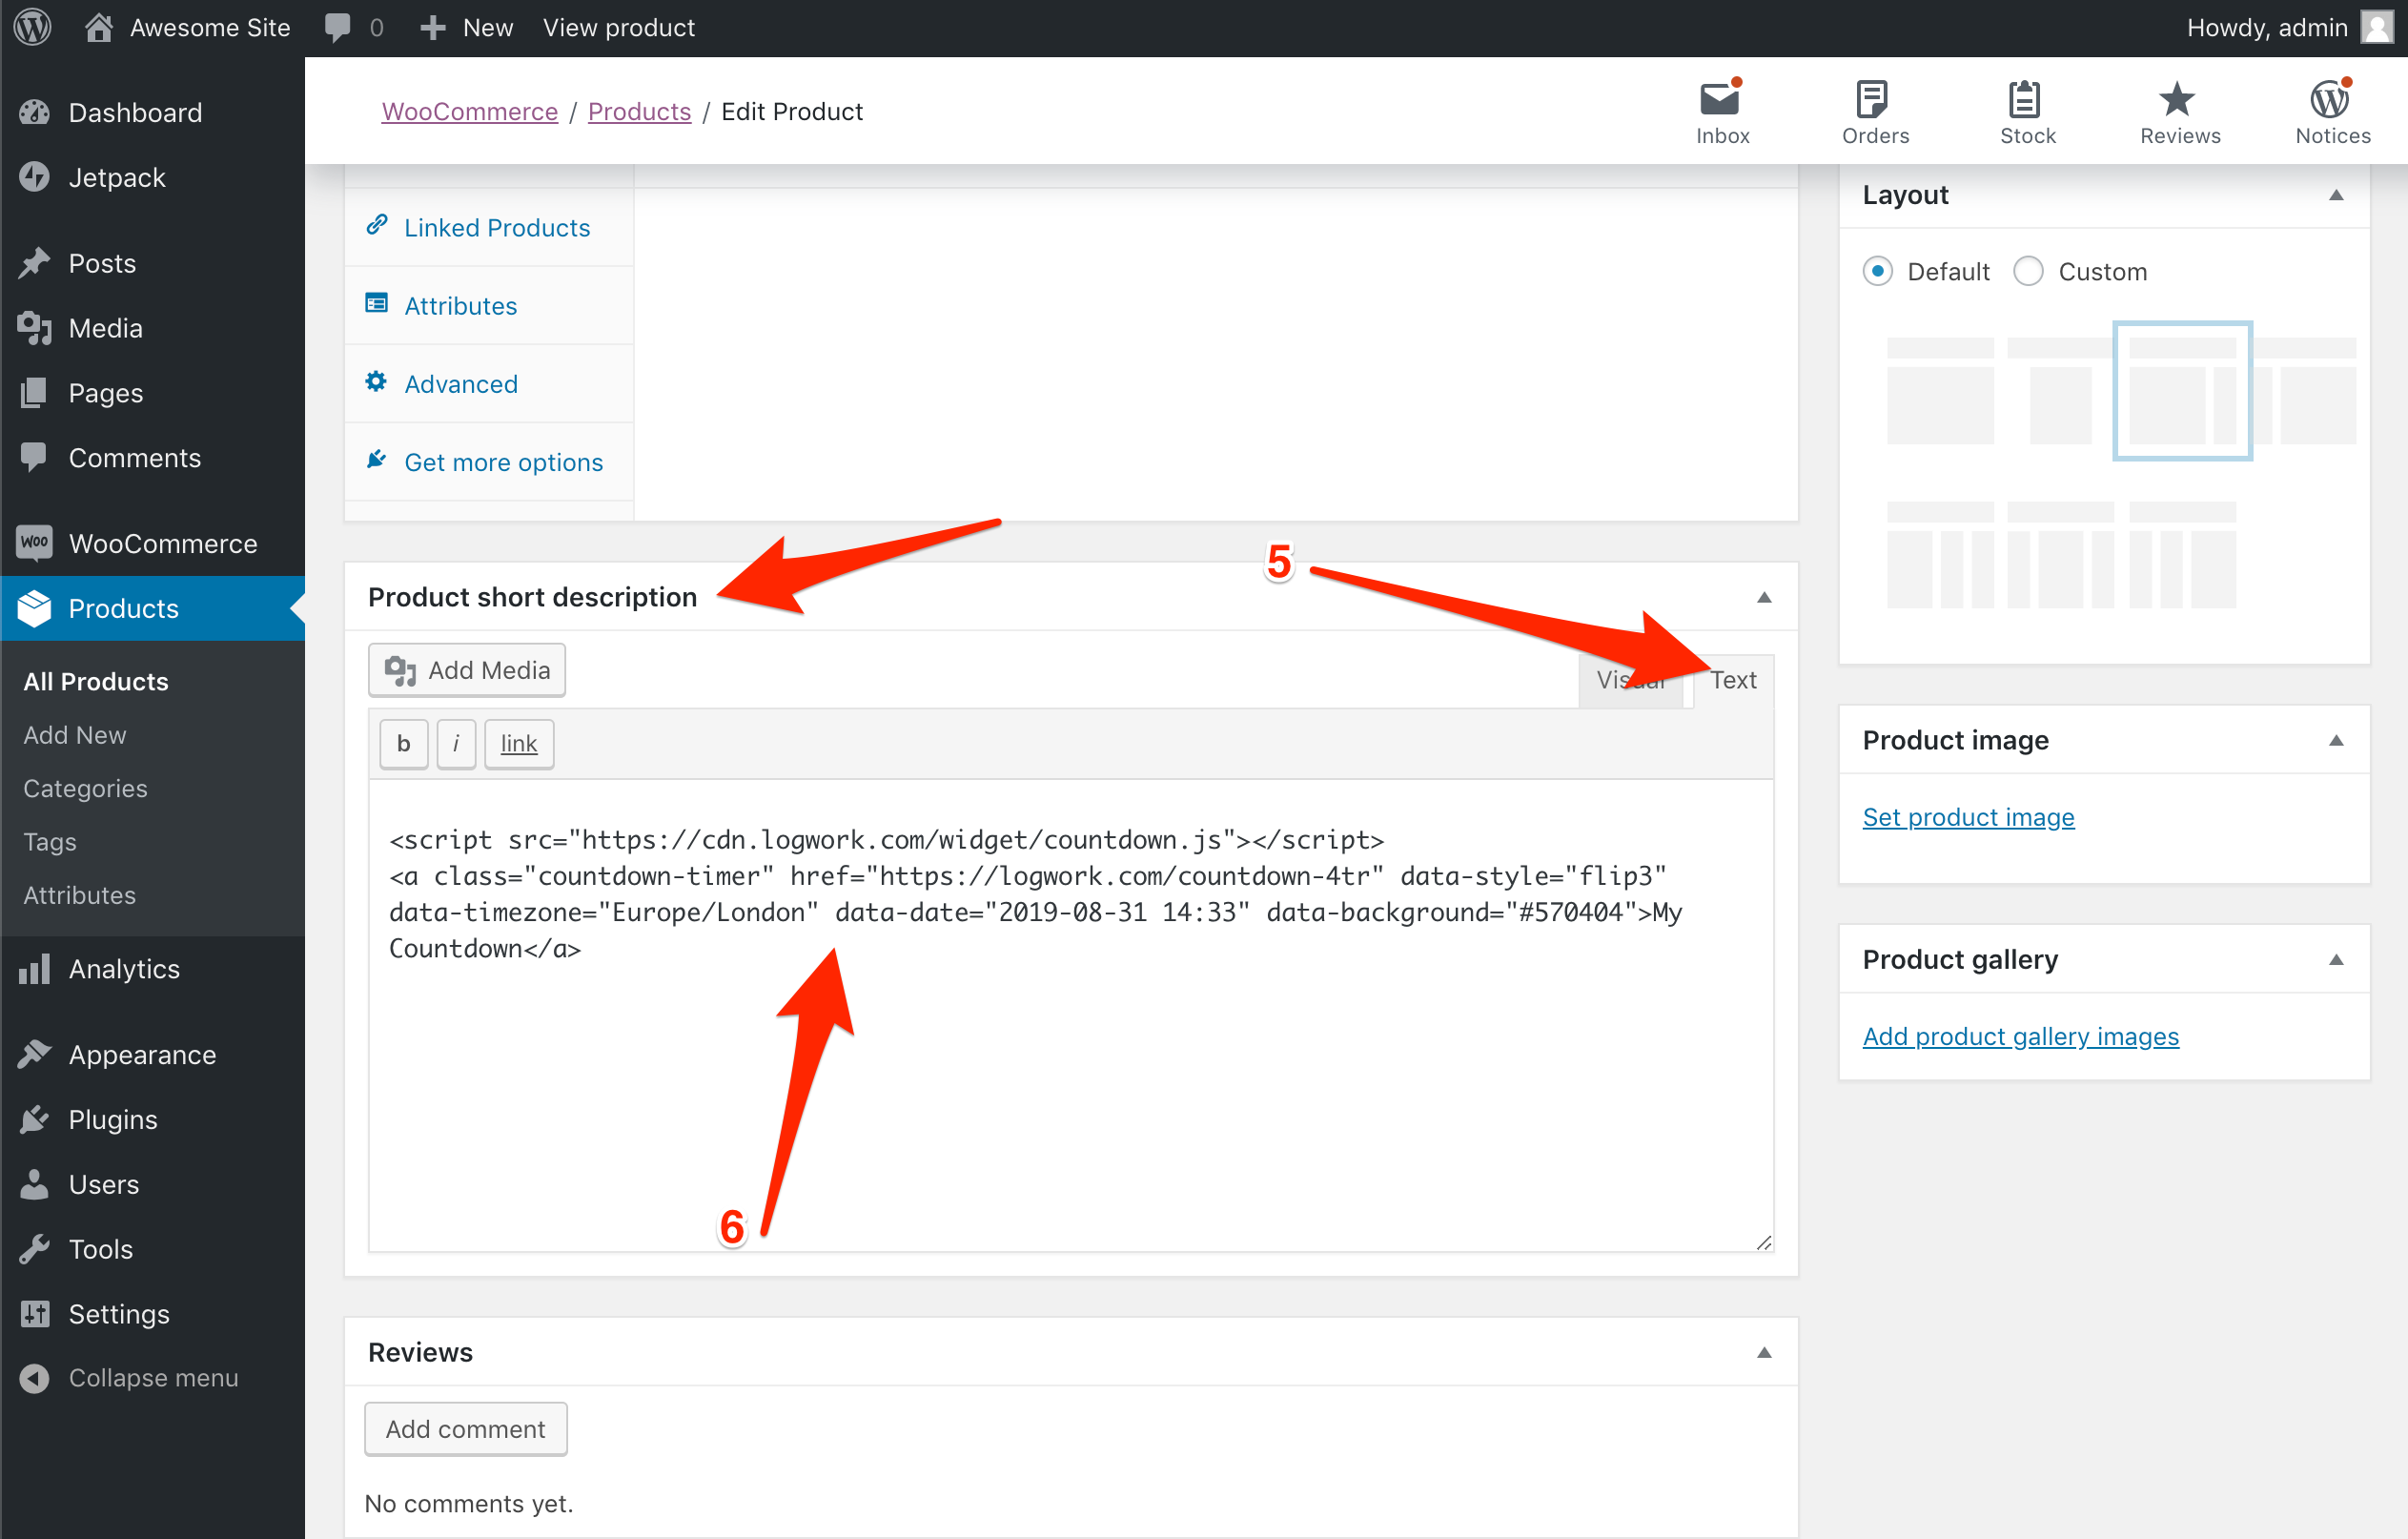
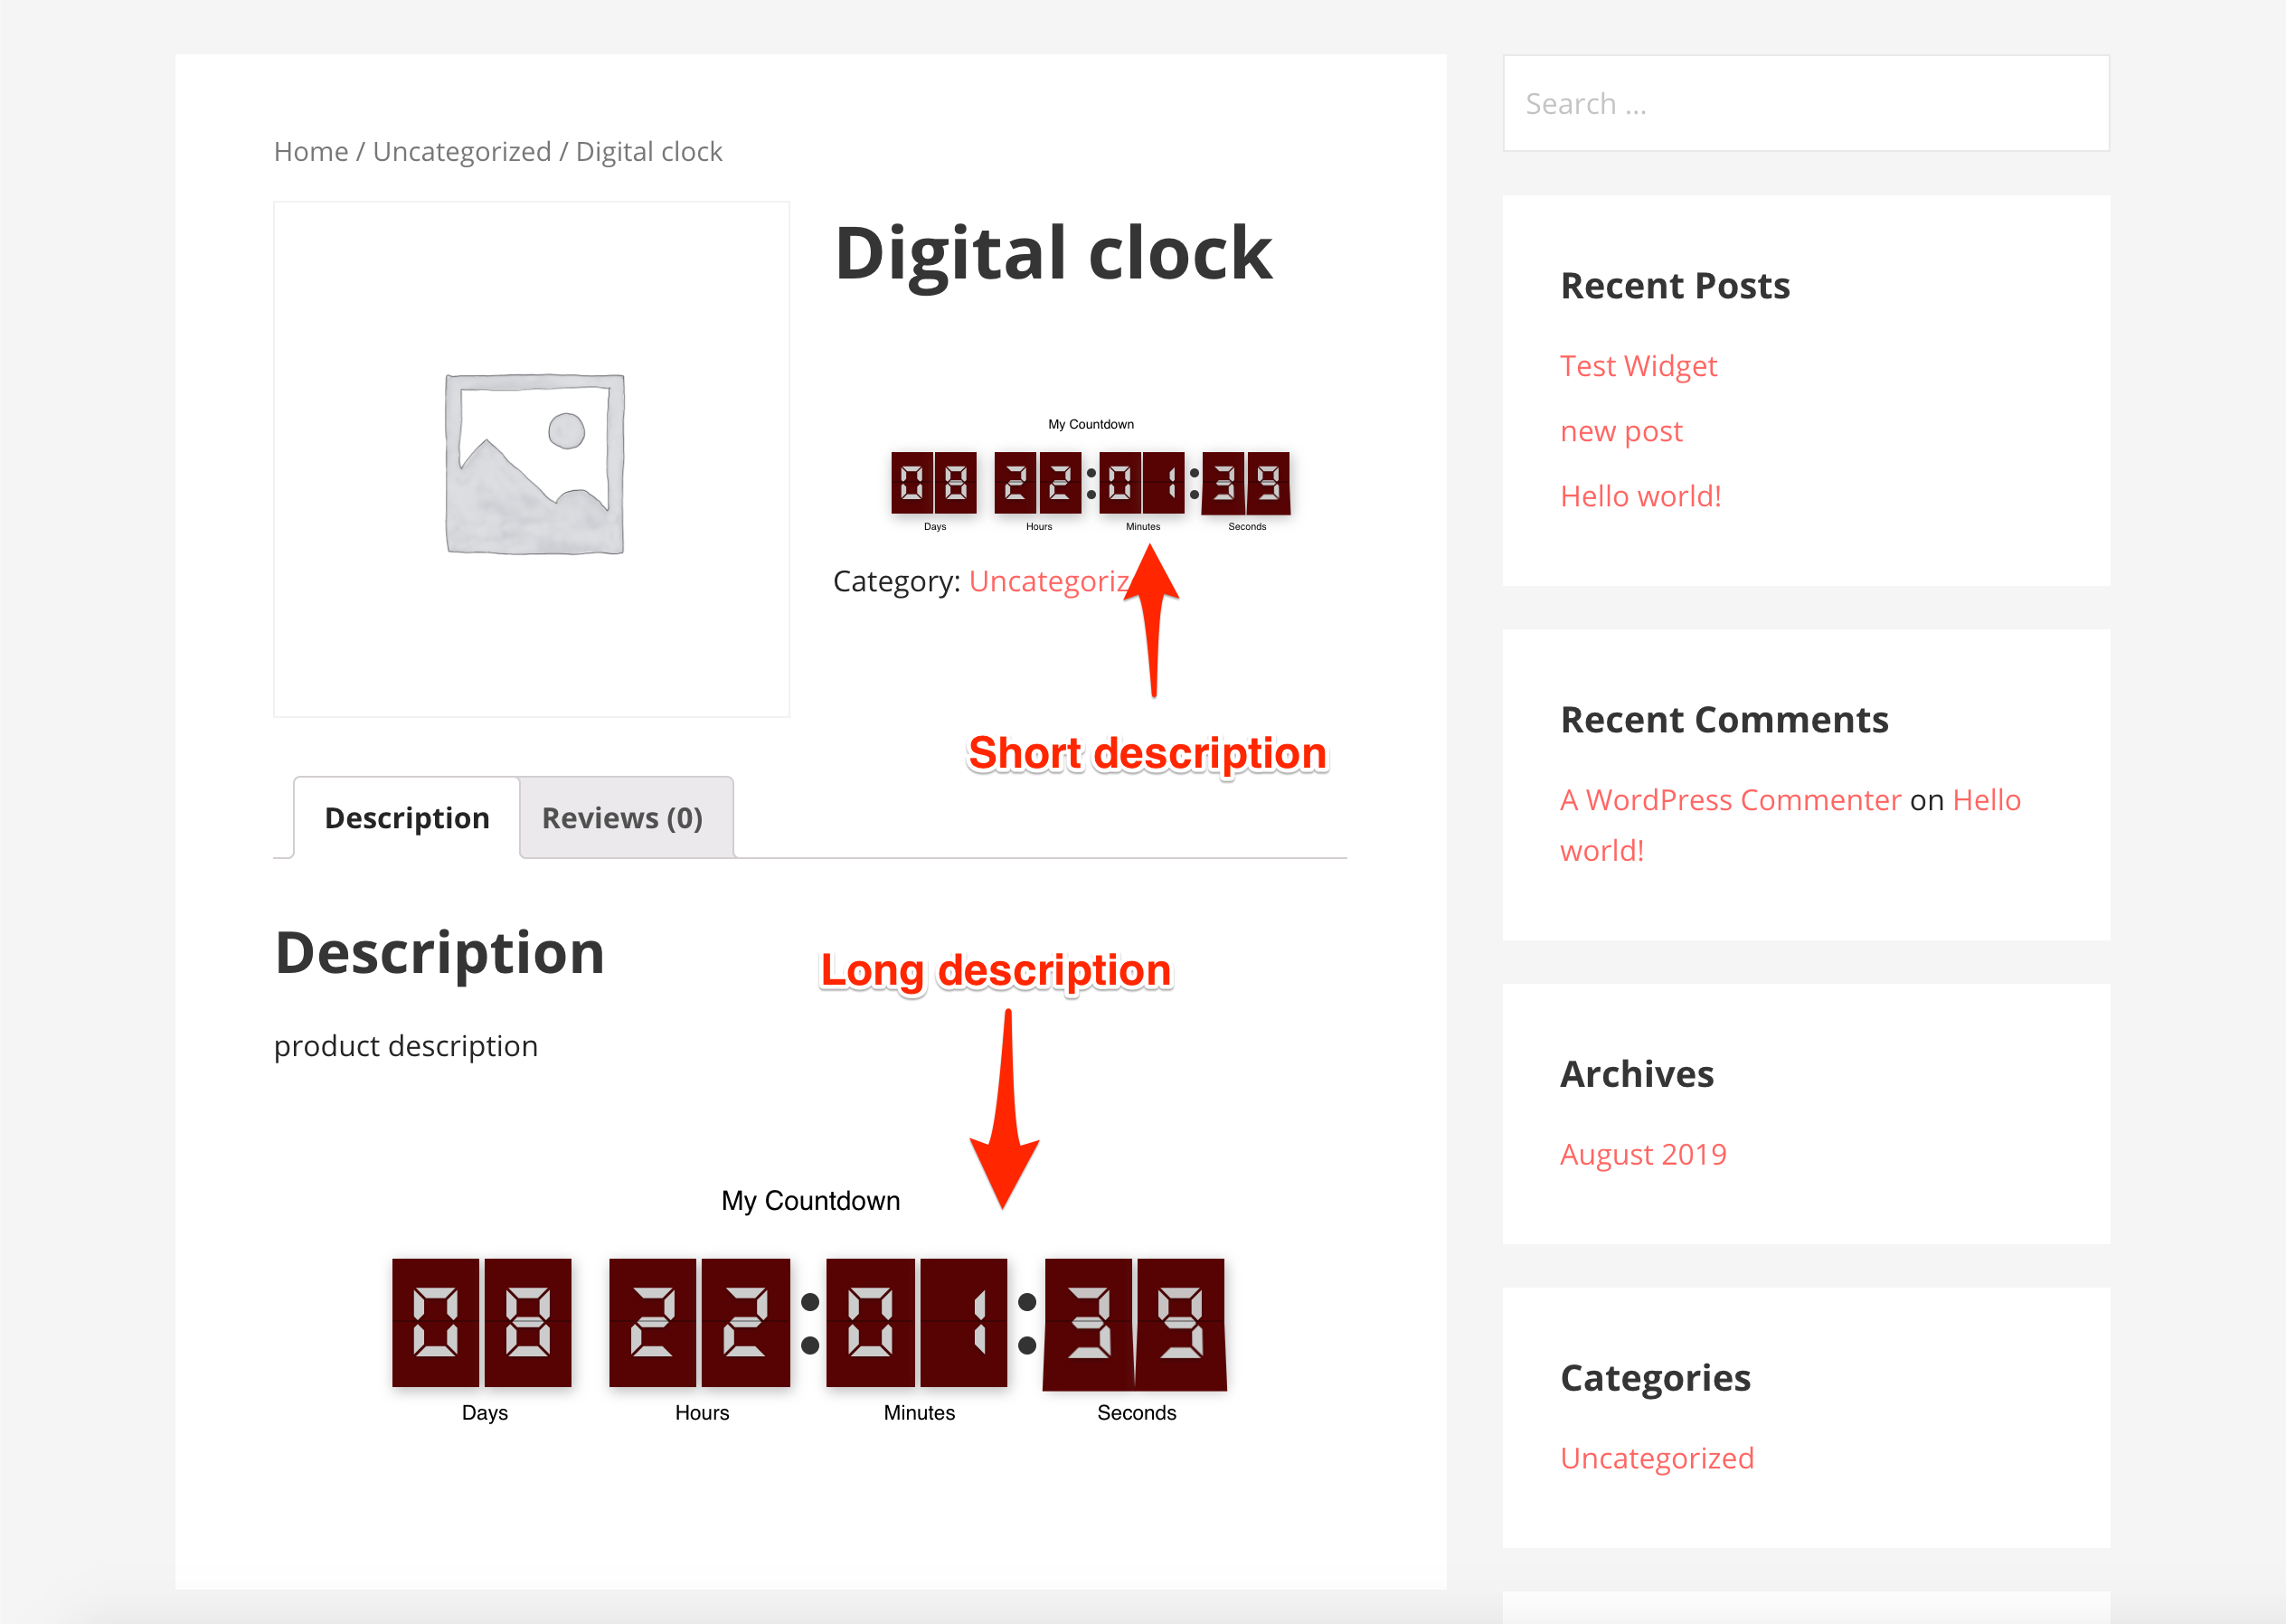
4. Save your deed and see that you can add the countdown timer as short and long description.
NOTE Feel free to contact us in case you have any questions!


